Azure App Services 2 – PaaS Compute Options
- Home Certification of Microsoft AZ-104
- Azure App Services 2 – PaaS Compute Options


Azure App Services 2 – PaaS Compute Options
4. If you have selected the resource group and region that contains an existing App Service plan that matches the selected operating system, then that plan will be autoselected. Otherwise, Azure will prompt you to create a new plan and select the pricing tier. It’s easy to understand this by looking at the plan name. If the plan name is prefixed with “(new),” that means a new plan will be created. As you can see, we are using an existing plan; hence, the (new) prefix is missing. Again, if you need a new one to be created, you can choose the Create New option.
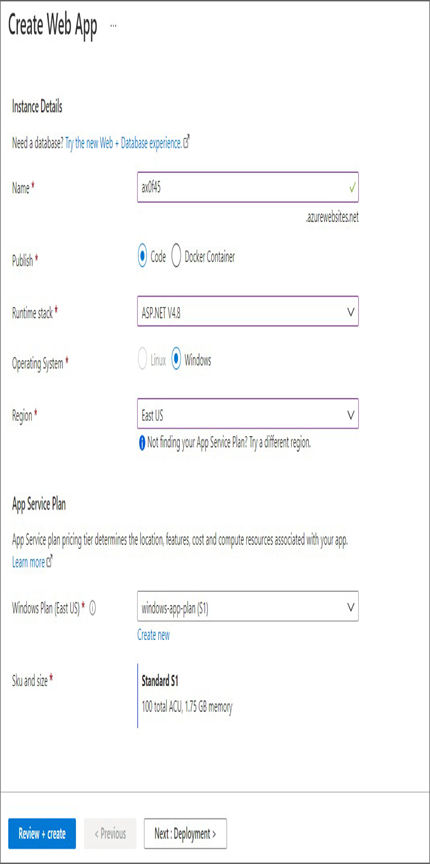
- Clicking Next will be take you to the Deployment blade. Here you can set up continuous deployment. We will talk about the deployment options later in this chapter. As of now, we will go with the default value: Disable.
- The next blade is Monitoring. This option will be enabled, and you will be asked to create an Application Insights instance. In our case, we are not planning to implement monitoring as of now, so you can change this to No.
- Click Review + Create, and you will be taken to the validation phase. Once the validation is done, click Create to create the App Service, and wait for the service to get provisioned.
- Once provisioned, navigate back to the App Services screen, and look for the new web app you created. Open the web app by clicking the name, and this will take you to the Overview blade.

9. Click URL shown in the Overview blade, and this will take you to a landing page similar to the one shown here.

You have successfully created the App Service, and you are able to access it. Now the question is how to bring your code to Azure. There are multiple ways to bring code to Azure starting from FTP all the way to DevOps strategies. Next, you will see the continuous deployment options available for deploying the code to an Azure App Service.