Scaling – PaaS Compute Options
- Home Certification of Microsoft AZ-104
- Scaling – PaaS Compute Options


Scaling – PaaS Compute Options
As you have seen in the case of virtual machine scale sets, you have two scaling methods available for App Service plans: scale out and scale up. From the Standard tier onward, you can enable autoscaling for your plan. The Basic tier supports manual scaling, while Free and Shared don’t support any sort of manual or autoscaling features. The two workflows available for scaling are here:
Scale Up/Down In the case of VMs, you scale up and down to increase or decrease the hardware specifications. Also, this process is practiced for resizing under-utilized resources. You can move from one tier to another using the scale-up/down option. For example, you started with Basic tier, and due to business requirements, you need more resources and capabilities like autoscaling. The solution here is to move to the Standard tier. Likewise, in the future if needed, you can scale to Premium as well. Conversely, you could come back to Basic if there are no business requirements. This will help you save costs. In short, the transition between tiers to increase or decrease the CPU, memory, and features is what is called scale up/down. If you are increasing, it is called scale up, and if you are downsizing, it’s called scale down.
Scale In/Out Increasing or decreasing the number of instances based on business requirements is termed as scale in/out. This process can be triggered manually, based on metric or schedule. In Table 9.1, you can see the maximum number of instances supported by each tier. For example, if you enable autoscaling for the Standard tier, you can have up to 10 instances. On the other hand, Isolated can scale out up to 100 instances, and where there is no business demand, it can scale in to the minimum number of instances you defined.
Let’s create an App Service plan and explore these scaling options. Note that it’s not necessary to create an App Service plan beforehand to create an App Service. You could create the App Service plan on the fly when you create the App Service. You will create a Free Tier and upgrade that to Standard and then explore the autoscaling options.
EXERCISE 9.1
Creating an App Service Plan
- Sign in to the Azure portal and search for App Service plans. Click App Service Plans, which will take you to the App Service Plans blade.
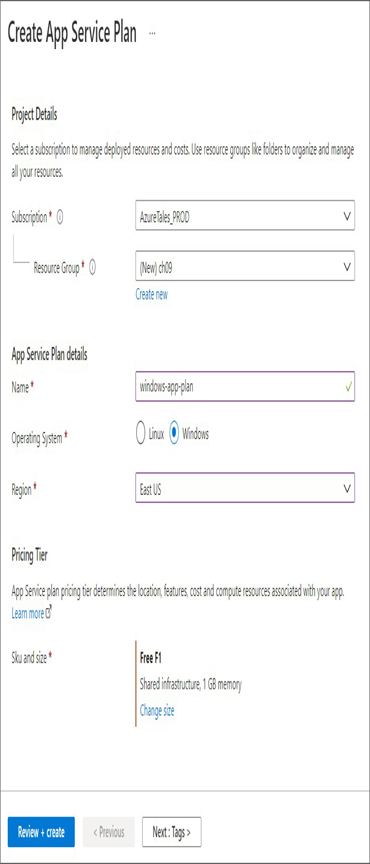
- Click Create to create the plan. Under the project details, you need to fill in the following details:
- Subscription: Select a subscription.
- Resource group: Select a resource group.
- Name: Provide a name for the App Service plan.
- Operating system: Select Linux or Windows. In this demonstration, you will be creating a Windows plan.
- Region: Select an Azure region.
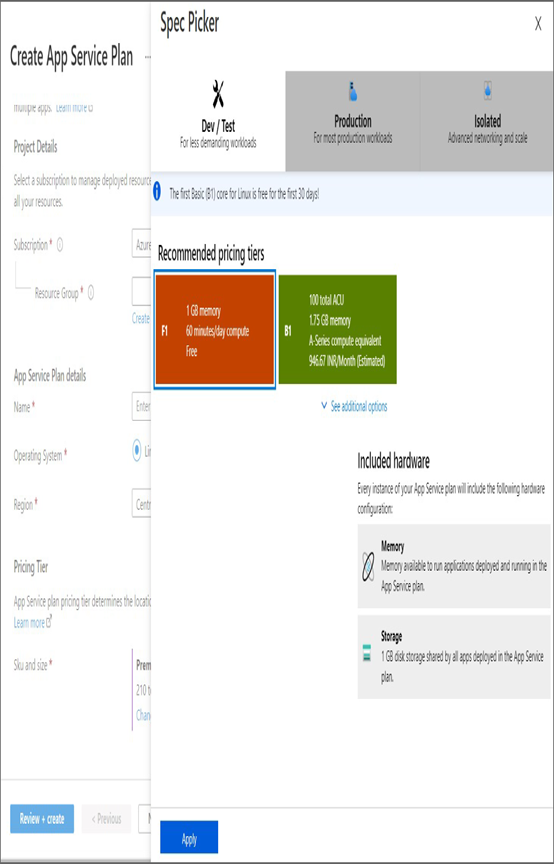
- Pricing Tier: This is where you choose the pricing tiers that were discussed in Table 9.1. You will select Free Tier (F1) from the Dev/Test tab. Free Tier offers only 60 minutes/day for running your application.
3. Once you have filled in all the details, you can click Review + Create.
- After completing the validation, click Create, and the plan will be created. You need to wait for the plan to get provisioned.
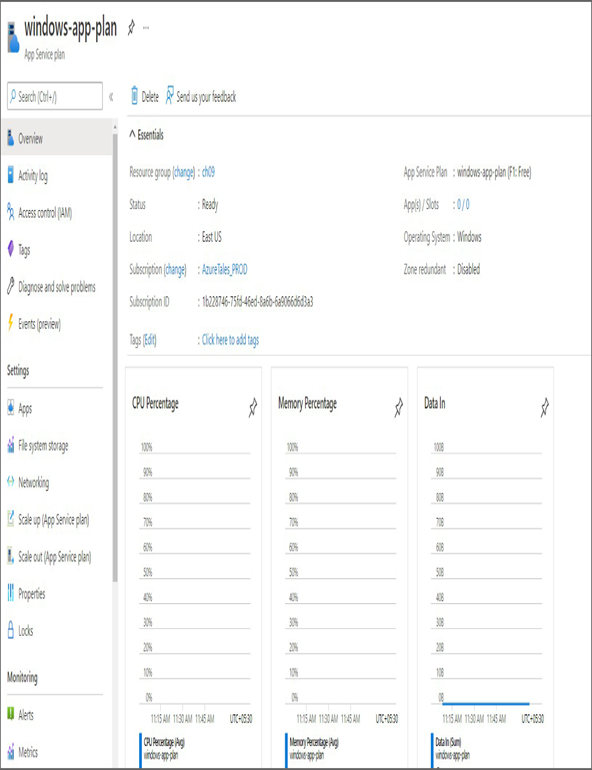
- Once the plan is provisioned, if you go back to the App Service Plan blade, you will be able to see that the plan is ready for consumption. Opening the plan will take you to the Overview, and you can see the basic details and metrics of the plan.
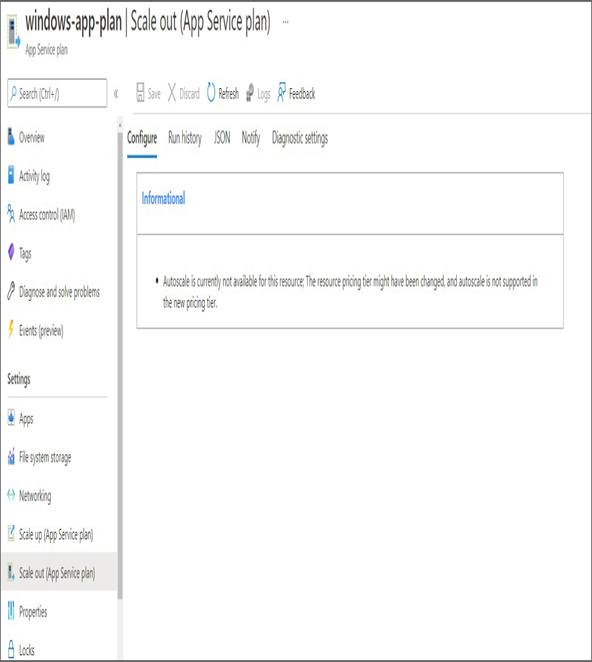
6. On the left menu, you will be able to see the Scale Up (App Service Plan) and Scale Out (App Service Plan) options. You will not be able to enable the scale-out options because manual scaling and autoscaling are not supported in the Free tier. Clicking Scale Out will throw an error message.
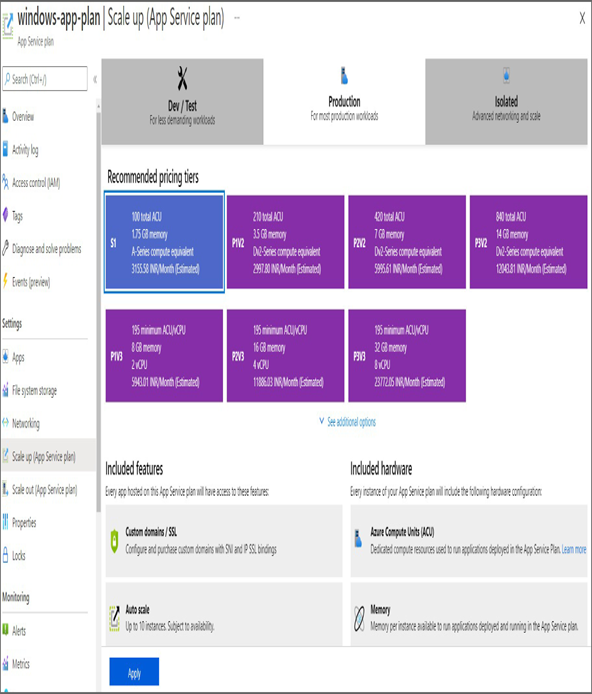
7. To configure the scale-out options, you need to upgrade the pricing tier. For this, you can click the Scale Up option. You will be presented with the set of available tiers. Let’s upgrade to the Standard: S1 tier by going to the Production tab and then selecting S1. S1 stands for Standard 1; there are others like S2 and S3 that offer more memory and disk space. Once you select S1, click Apply to save the configuration.
8. Now that you have upgraded to the Standard tier, let’s see if you can configure the scale-out options. On the Scale Out blade, you will be presented with the Manual Scale and Custom Autoscale options.
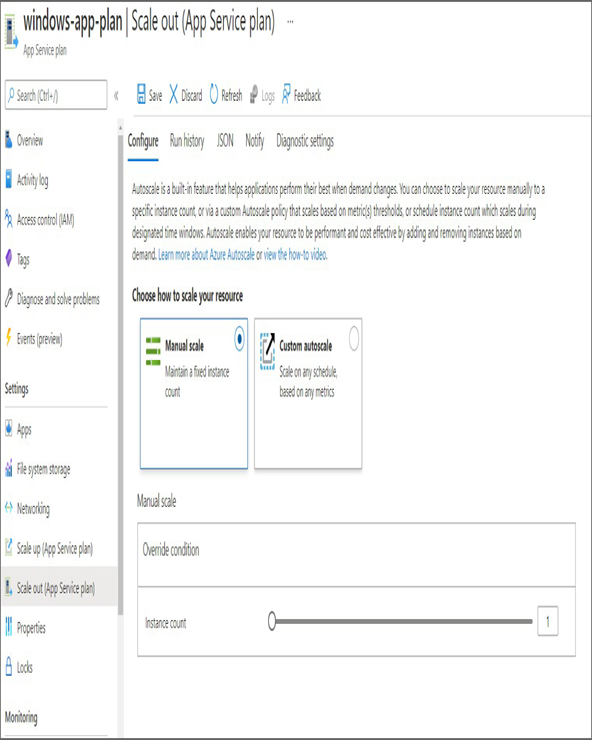
- Manual Scale can be used to specify the number of instances manually, and the plan will maintain that particular instance count. The slider can be used to control the number of instances.
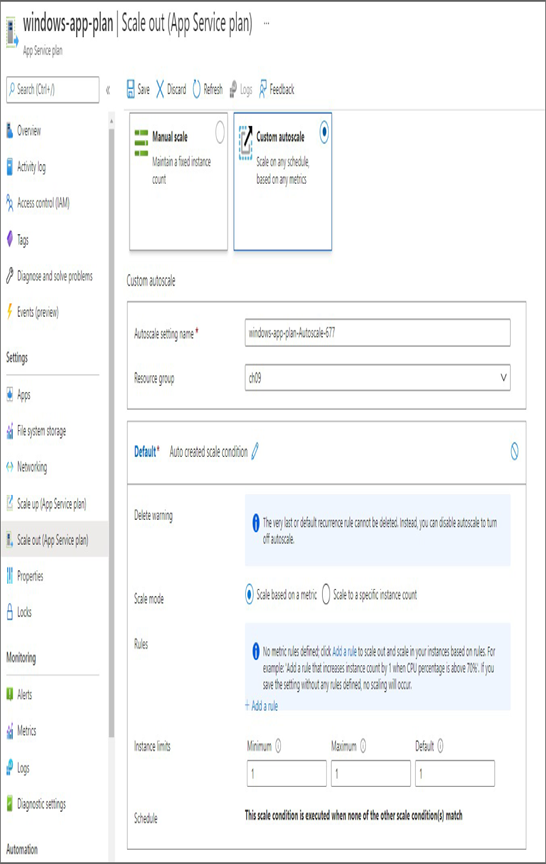
- Choosing Custom Autoscale will show the options to configure autoscaling. As you can see, the scaling can be executed based on a metric or a schedule. You saw a similar configuration with virtual machine scale sets.
11. As of now, you haven’t deployed any apps to the plan. You simply created the compute resources. In the next section, we will talk about App Services, and then you will start deploying apps to this plan.